A School Project Idea: Make a Model of the Eiffel Tower
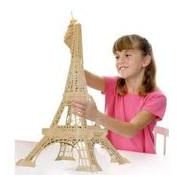
You can make a model of this magnificent structure with things available to you at home. This design is simple enough anyone could do it!
There are several different materials that may work including toothpicks, cardboards, matchsticks or popsicle sticks. The choice of materials depends upon your creativity. There is no need to buy an expensive kit as you can make an attractive model on your own.
Method 1
Supplies Needed
- Cardboard
- Matchsticks
- Glue
- Twisty Ties
- A detailed photo of Eiffel Tower
Directions
The first step is to print out a picture of the Eiffel Tower. Try to find one that shows the tower from one side. You will need to make four sides of the tower in the model using this picture. Resize this picture to the size you want your finished model to be.
Now cut out the picture along the outlines.
Take a large cardboard box and trace the picture of the tower onto the cardboard. Cut out the cardboard. Now, lay the matchsticks on top of the photo on the lines of the tower image. Make sure to cut the flammable part of the matchsticks off.
Glue the matchsticks in their position.
Repeat this process of tracing the image on the cardboard, laying and gluing the matchsticks three more times for each side of the tower.
Assemble all the pieces together with glue. Use twisty ties to hold the pieces until the glue has dried. When it is done, paint them the way you want.
Method 2
Supplies Needed
- Popsicle Sticks
- Styrofoam
- Hot Glue
- Scissors
- Spray Paint
Directions
Take a Styrofoam sheet and cut it into three square pieces in descending sizes. Cut the squares in sizes of 10, 6 and 3 inches on one side. Out of three pieces, the largest one is for the base and the other two are for the intermediate levels of the model building. In addition, the base square should be 2 inches thick and the other two pieces should be 1 inch thick.
Now take the base piece and insert one Popsicle stick on each corner. These sticks should be slightly slanting inwards. Now push the 6-inch Styrofoam piece on the top of the Popsicle sticks placed on the larger piece. Insert one Popsicle stick on each corner of this second Styrofoam square too slightly slanting inwards as before. Now take the smallest square and push it on the top of the second level of Popsicle sticks.
Take two popsicles sticks and stick them end to end. Make three more such pairs. When done, insert one such pair on each corner of 3-inch square. These sticks should be slanting enough to meet all other three at the center. Glue them together to make a pointed tip.
Glue the Popsicle sticks between the already inserted sticks on each level. When the structure is ready, spray paint it in desired color.
References
- Image Credit: http://qwickstep.com/search/build-eiffel-tower.html
- http://www.papertoys.com/eiffel.htm
- http://www.artistshelpingchildren.org/buildingstownscitiesartscraftstideasprojectskids.html
- Official site of the Eiffel Tower: http://www.tour-eiffel.fr/